

Velvet Upholstery Cleaning Process: A Homeowner’s Guide
The velvet upholstery cleaning process is a structured method that begins with identifying your fabric’s cleaning code and continues through careful vacuuming, targeted spot treatment, and pile restoration. Velvet is one of the most rewarding fabrics to own and one of the most unforgiving to clean incorrectly. The wrong product or too much moisture can crush the pile permanently, leave water halos, or cause irreversible dye transfer. Understanding what the velvet upholstery cleaning process actually involves, step by step, gives you the knowledge to protect a significant investment in your home.
What is the velvet upholstery cleaning process, step by step?
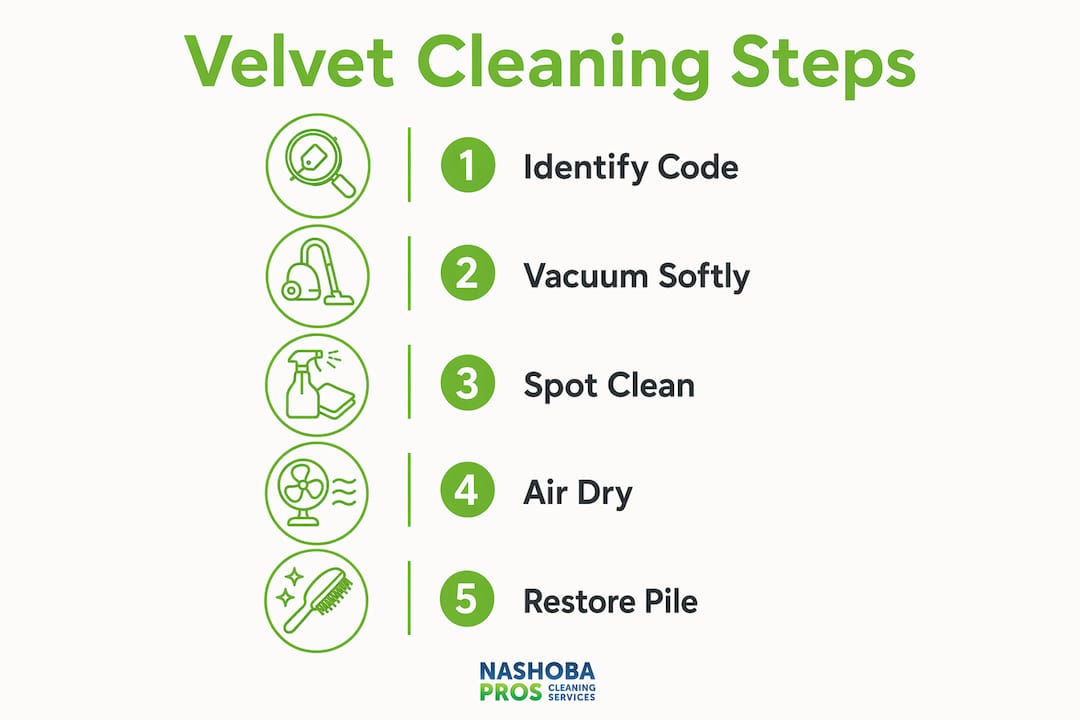
The velvet upholstery cleaning process is defined by four core stages: code identification, routine vacuuming, spot cleaning, and pile restoration. Each stage depends on the one before it. Skip the code check, and you risk applying the wrong cleaner. Skip the vacuuming, and spot cleaning pushes surface dirt deeper into the pile. Velvet cleaning is mostly preparation. The actual cleaning is a small fraction of the process but carries the highest risk of damage.
The industry term for this structured approach is fine upholstery cleaning, a category that covers delicate, pile-based fabrics requiring low-moisture methods and careful technique. Velvet sits at the top of that category because its looped or cut pile fibers react to heat, moisture, and friction in ways that flat-woven fabrics do not. Knowing this upfront shapes every decision you make during cleaning.
What are fabric cleaning codes and why do they matter for velvet?
Cleaning codes are the single most important piece of information before you touch velvet with any cleaner. The code is more critical than the product you choose. Four codes govern upholstery cleaning:
- W (Water-based): Safe to clean with water-based solutions, including mild dish soap or a distilled water and white vinegar mix.
- S (Solvent-based): Water will damage this fabric. Use only dry-cleaning solvent or solvent-based upholstery cleaner.
- WS (Water or Solvent): Either type of cleaner is acceptable, giving you more flexibility.
- X (Vacuum only): No liquid of any kind. Vacuuming and light brushing are the only safe options.
The tag is usually sewn under a cushion or along the bottom frame of the sofa. If the tag is missing or illegible, treat the fabric as S-coded until you can confirm otherwise. Ignoring the cleaning code leads directly to watermarks, pile distortion, or color loss, all of which are difficult or impossible to reverse.
Pro Tip: Before any cleaning attempt, photograph the tag and save it. Velvet sofas often get reupholstered or resold without documentation, and having the original code on record saves you from guessing later.
How to vacuum and maintain velvet upholstery properly
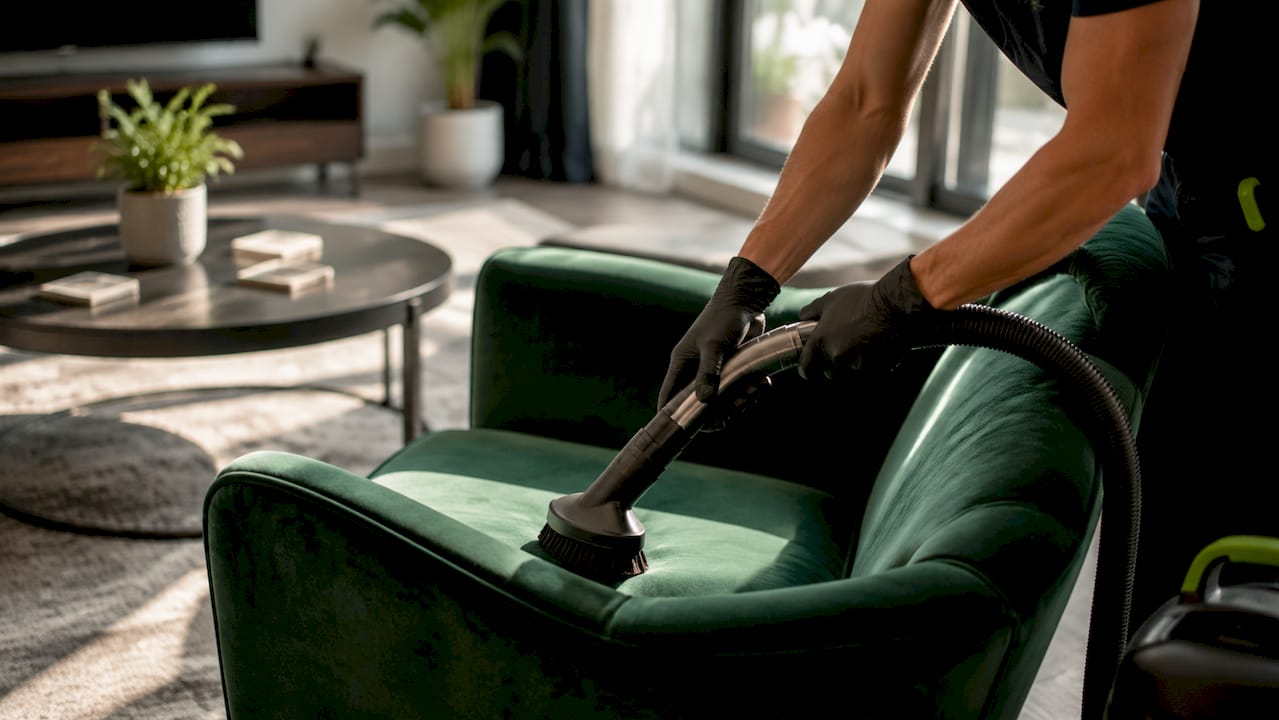
Weekly vacuuming with a soft brush upholstery attachment at low suction is the single most effective maintenance habit for velvet furniture. Regular vacuuming prevents dirt from embedding in the pile, which reduces how often you need to spot clean or call in a professional. Think of it as the equivalent of brushing your teeth. Skip it long enough, and the problem compounds.
Follow these steps for safe routine maintenance:
- Set your vacuum to low suction. High suction pulls at the pile fibers and can distort their direction permanently.
- Attach a soft brush upholstery tool. A bare nozzle concentrates suction in one spot and damages the pile. The brush distributes pressure evenly.
- Vacuum in the direction of the nap. Run the attachment the same way the pile naturally lies. Vacuuming against the nap can permanently distort velvet’s appearance, a mistake that no amount of steaming fully corrects.
- Work in overlapping passes. Treat each section like you are painting. Overlapping strokes pick up more debris without requiring extra pressure.
- Brush the pile gently after vacuuming. A soft-bristle upholstery brush, stroked in the direction of the nap, lifts any fibers that the vacuum flattened and restores the fabric’s sheen.
During pollen season or in high-traffic rooms, increase vacuuming to twice a week. Dust and fine particles settle into velvet faster than into tightly woven fabrics, and letting them sit accelerates wear.
Pro Tip: Use a lint roller between vacuuming sessions to pick up pet hair and surface debris without touching the pile with any tool that could snag fibers.
What are the safe spot cleaning techniques for velvet?
Spot cleaning velvet requires matching your method to the fabric’s cleaning code. Blotting stains from the outside inward with a white microfiber cloth is the correct technique for all velvet types. Never rub. Rubbing pushes the stain deeper and crushes the pile in the affected area.
For W and WS coded velvet
Mix equal parts distilled water and white vinegar, or dissolve a small amount of mild dish soap in lukewarm water. Apply only the suds, not the liquid itself, to the stained area using a white microfiber cloth. A light mist from a spray bottle set to its finest setting is acceptable for larger areas. Oversaturation is the primary cause of pile crushing and water halos on velvet. Less moisture is always better.
For S coded velvet
Use only a solvent-based upholstery cleaner. Apply a small amount to a white cloth first, then blot the stain. Never spray solvent directly onto the fabric. Test in a hidden spot, such as the back corner of a cushion, and wait 10 minutes before treating the visible area. Solvent cleaners evaporate faster than water, which is why they are safer for moisture-sensitive velvet constructions.
For greasy or oily stains on any velvet type
Pre-treat with an absorption powder such as cornstarch or baking soda before applying any liquid cleaner. Sprinkle the powder generously over the stain, let it sit for 15–20 minutes, then vacuum it up gently with the soft brush attachment. This step pulls the oil out of the fibers before it sets. Skipping it and going straight to liquid worsens stain setting and increases pile damage.
After any spot cleaning, allow the velvet to air dry completely at room temperature. Keep it away from direct sunlight and heat sources during drying. Once dry, restore the nap with a soft-bristle brush stroked in the direction of the pile.
Pro Tip: Always use white microfiber cloths for blotting. Colored cloths can bleed dyes into damp velvet, causing permanent discoloration that no cleaning method removes.
How does steaming help restore velvet upholstery?
Steaming is primarily a pile restoration tool, not a deep cleaning method. Pile compression is normal wear on velvet, not permanent damage. Low-heat steaming can rejuvenate flattened areas and bring back the fabric’s texture without any liquid contact.
Safe steaming practices for velvet:
- Hold the steamer at least 6 inches from the fabric surface. Direct contact transfers too much heat and moisture at once.
- Use the lowest heat setting available on the steamer.
- Move the steamer continuously. Holding it in one spot concentrates moisture and risks a water spot.
- Brush the pile gently with a soft-bristle brush immediately after steaming, while the fibers are still warm and pliable.
- Never press a steam iron directly onto velvet. The plate contact crushes the pile flat and the heat can melt synthetic velvet fibers.
Consumer steamers often produce heat and moisture levels too aggressive for velvet, causing shrinkage and water spots. Professionals use precision-controlled, low-moisture extraction tools that deliver controlled vapor without saturating the fabric. If your home steamer runs hot or produces heavy steam, skip it and use a soft brush alone.
Pro Tip: Hang a velvet cushion cover in a steamy bathroom for 10–15 minutes as a gentler alternative to direct steaming. The ambient moisture relaxes the pile without any direct heat contact.
What common mistakes do homeowners make when cleaning velvet?
Most velvet damage is self-inflicted. These are the mistakes that cause permanent harm:
- Skipping the cleaning code check. Applying water to an S-coded velvet or solvent to a W-coded one causes immediate and often irreversible damage.
- Rubbing or scrubbing stains. Rubbing crushes the pile and embeds the stain deeper. Blotting is the only correct motion.
- Using colored cloths. Dye transfer from a colored cloth onto damp velvet is nearly impossible to remove.
- Over-wetting the fabric. Too much liquid causes uneven drying, which leaves water halos that are visible even after the fabric dries completely.
- Using a bare vacuum nozzle. Concentrated suction without a brush attachment pulls and distorts pile fibers.
- Skipping the patch test. Always test any cleaner in a hidden area first. Even products labeled safe for velvet can react differently depending on dye lots and fiber composition.
“Knowing when to stop is as important as knowing how to start. Pushing past the point where the fabric responds well leads to watermark damage that no amount of re-cleaning fixes.” — Professional textile expert Chris Kiadii, as cited in industry guidance on velvet cleaning limits.
The most overlooked mistake is treating oily stains with liquid cleaners before absorbing the grease first. Oily stains require dry absorption before any liquid is applied. Skipping this step sets the stain and makes it significantly harder to remove.
Key takeaways
The velvet upholstery cleaning process requires identifying the fabric code first, then applying low-moisture techniques in the correct sequence to protect the pile and prevent permanent damage.
| Point | Details |
|---|---|
| Check the cleaning code first | The W, S, WS, or X code determines every product and method you can safely use. |
| Vacuum weekly along the nap | Use a soft brush attachment at low suction to prevent dirt buildup and pile distortion. |
| Blot stains, never rub | Work from the outside inward with a white microfiber cloth to lift stains without crushing fibers. |
| Pre-treat oily stains with powder | Apply cornstarch or baking soda before any liquid cleaner to pull grease out of the pile. |
| Use steaming for pile restoration | Low-heat steaming corrects compression; follow immediately with gentle brushing to reset the nap. |
What I have learned after years of cleaning velvet
After cleaning velvet upholstery across hundreds of homes in the Westford area, the pattern I see most often is homeowners who cleaned confidently and quickly, then called us to fix the result. Velvet punishes speed. The fabric rewards patience and preparation far more than it rewards the right product.
The detail that surprises most people is how little of the process involves actual cleaning. Preparation, including code identification, patch testing, and assessing the soiling pattern, takes longer than the cleaning itself. That preparation phase is where the outcome is decided. The cleaning is almost anticlimactic when the preparation is done correctly.
Velvet’s sensitivity to moisture is also consistently underestimated. I have seen water halos appear from a single over-wet blot on a dry afternoon. The fabric does not forgive saturation, and it does not give you a second chance once the water sets unevenly. Low-moisture methods, patience, and knowing when to stop are the three habits that separate good velvet care from expensive mistakes.
The homeowners who maintain their velvet best are not the ones who deep clean it most often. They are the ones who vacuum it weekly, address spills within minutes using the correct technique, and call a professional before a stain becomes a project. Routine gentle care extends the life of velvet far more than periodic aggressive cleaning.
— Jim
When professional velvet cleaning makes sense
Velvet that has heavy soiling, set-in stains, or visible pile distortion across large areas is a job for a trained technician. DIY methods work well for routine maintenance and fresh spills. They are not designed for the kind of deep extraction that restores heavily soiled velvet without risking further damage.

Nashobapros has provided fine upholstery cleaning to homeowners in Westford, MA and the surrounding Nashoba Valley area for over 30 years. Every product used is pet-safe and family-safe. The team evaluates fabric type, soiling pattern, and cleaning code before selecting a method, which is exactly the preparation that protects velvet from the mistakes described above. For a free quote on professional upholstery cleaning, call or book online. Most jobs can be scheduled quickly.
FAQ
What does the velvet upholstery cleaning process involve?
The velvet upholstery cleaning process involves identifying the fabric’s cleaning code, vacuuming with a soft brush attachment, spot cleaning with the appropriate solution, and restoring the pile with gentle brushing or low-heat steaming.
Is velvet upholstery washable with water?
Velvet labeled with a W or WS cleaning code is safe to clean with water-based solutions. Velvet labeled S must be cleaned with solvent only, and X-coded velvet should only be vacuumed.
How do I remove a stain from velvet without damaging it?
Blot the stain from the outside inward using a white microfiber cloth and the cleaner appropriate for your fabric’s code. Never rub, never oversaturate, and always test in a hidden area first.
Can I use a steam cleaner on velvet furniture?
Low-heat steaming at a distance corrects pile compression but is not a substitute for spot cleaning. Consumer steamers that run hot or produce heavy moisture can shrink velvet fibers or leave water spots.
How often should I vacuum velvet upholstery?
Vacuum velvet at least once a week using a soft brush upholstery attachment at low suction, always moving in the direction of the pile. During high-pollen seasons or in heavily used rooms, twice a week is better.